CS3710 -Computer Graphics-
By: April Banack
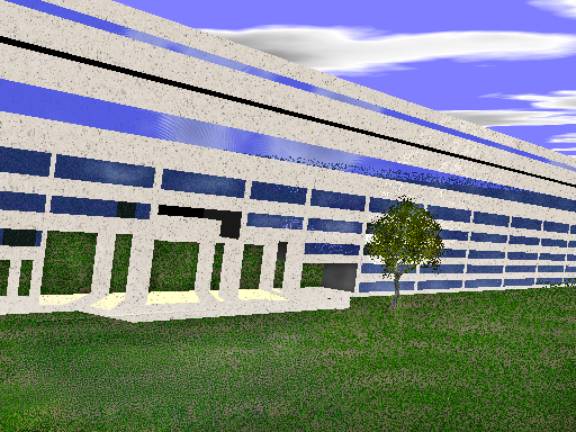
For this
assignment I chose to create an image of the University of Lethbridge using
POV-Ray. To begin I created the main
building just as a three-dimensional box and then spent a bit of time getting
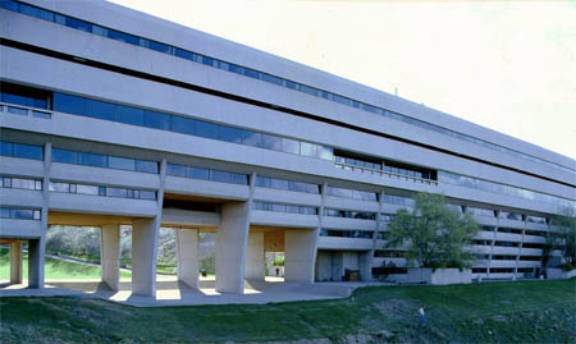
the angle of the building right. I used
the picture below as a guide for my image.
When I was
satisfied with the angle of the structure I began working on the windows. This took more time than it might seem
because I started out trying to situate the windows overtop of the actual
structure but when that didn’t work I searched among many POV-Ray tutorials and
found that the easiest way to add the windows was to use the difference function
which carves out one shape from another.
My first attempt with this function produced undesirable results. The difference among my objects was
left looking speckled instead of as a solid cutout. Again, I searched the POV-Ray tutorials and found the solution
through www.f-lohmueller.de/pov_tut/csg/povcsg3e.htm.
The solution to the speckled problem offered by this web site was successful
and I was able to use it for the windows in my image. I also made use of difference by cutting out section of the
building to create the structured archway.
Once the
basic design and angle of the building were complete I then added textures and
finishes to both the building and the windows.
The building itself was layered with two textures, one of which was transparent,
in order to get the right look of the actual building that I was modeling my
image after. Again, www.f-lohmueller.de/pov_tut/addon/insert61.htm
is an excellent source to find examples of the many textures available to
POV-Ray. I referred to this web site a
lot when selecting the textures and finished for my building. It took some trial and error but eventually
I found a combination of textures that worked.
The windows were given a glass texture as well as a reflective finish so
that the reflection of the sky plane could be seen in the windows. Also, the
columns the run across the bottom half of the building were created using a
simple box object that was called within a while loop to avoid creating each
individual column.
Another
good resource that I should mention is the POV-Ray tutorial that comes with
POV-Ray for Windows version 3.6. It
helped me get started with the basic structure of object and of creating
scenes; it also answered a lot of my questions.
The next
step was the landscaping. This was much
more difficult than creating the building.
I was able to find and download additional include files for both the
grass and the tree. The grass code came
from www.runevision.com/3d/include/
and came with example pictures and their source codes, which I studied and then
applied to my own image. It took some
time to apply it correctly but it eventually worked out. The tree came from www.aust-manufaktur.de/austv2.html
and proved even more difficult to apply to my image. The tree image within the include files had to be scaled down
quite a bit, translated and rotated in order to fit in with my image.
The sky was
probably the easiest to implement. At first the sky seemed intimidating and
hard to implement but as it turn out POV-Ray supplies different sky textures.
The sky was simply a plane with the Bright_Blue_Sky texture applied to
it. The scale and finish
of the plane can also be specified.
The most
difficult part of this image was lighting!
I was never satisfied with the lighting; I tried many different light
sources and spotlights but I couldn’t seem to find exactly what I wanted. The
light that is shining from behind the building and through the archway was
created using a spotlight and was given a yellow hue.
Once my
image was complete I used Photoshop to brighten up the image and fix some of
the lighting problems that I was having.