THE PROCESS OF MAKING THE SADDLEDOME
|
 I
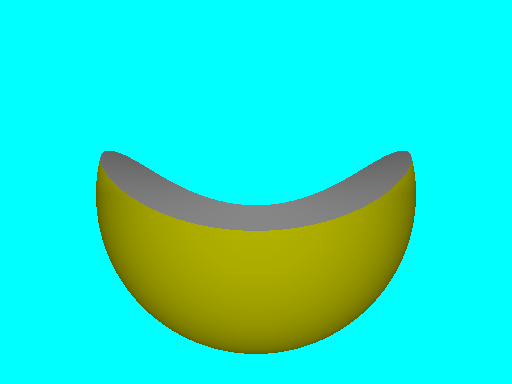
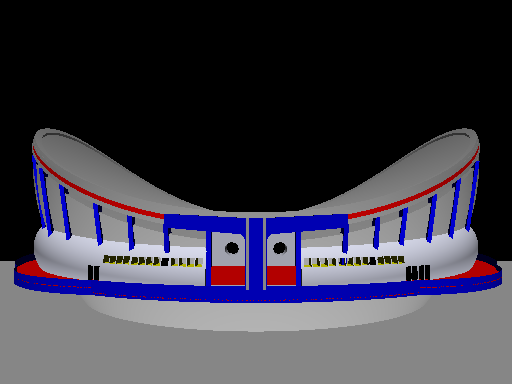
began this whole project with a simply sphere, and took away a very
large cylinder from it, producing what would become my Saddledome.
I choose to leave all the texturing and lighting to the end and
focus on getting a "Saddledome-like" object done first. Thus I used
bright and contrasting colors early to see how the different shapes
fit together and what needed to be added or removed. I
began this whole project with a simply sphere, and took away a very
large cylinder from it, producing what would become my Saddledome.
I choose to leave all the texturing and lighting to the end and
focus on getting a "Saddledome-like" object done first. Thus I used
bright and contrasting colors early to see how the different shapes
fit together and what needed to be added or removed. |
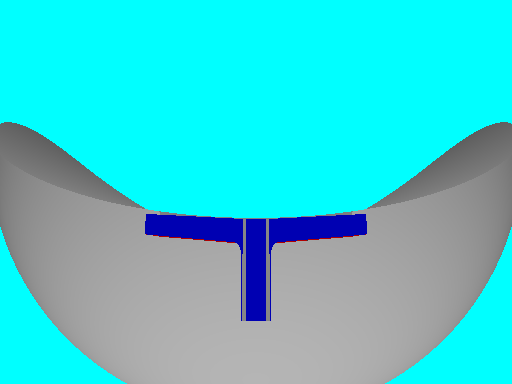 Onto
the my "dome" I added the T-shaped arch at the front. This was a
little bit tricky, as the top of the T is not perpendicular, so I
need to angle it slightly, and then take away a little cylinder to
let it curve into the base. Also from a different view of the
finished project, you can see that the behind the 'T' arch was
removed so allow the walk way to have some consistent realism. One
final addition to the shape of the T was to remove a little bit from
the front (the blue part) leaving a fringe (the grey) similar to
that of the real thing. Onto
the my "dome" I added the T-shaped arch at the front. This was a
little bit tricky, as the top of the T is not perpendicular, so I
need to angle it slightly, and then take away a little cylinder to
let it curve into the base. Also from a different view of the
finished project, you can see that the behind the 'T' arch was
removed so allow the walk way to have some consistent realism. One
final addition to the shape of the T was to remove a little bit from
the front (the blue part) leaving a fringe (the grey) similar to
that of the real thing. |
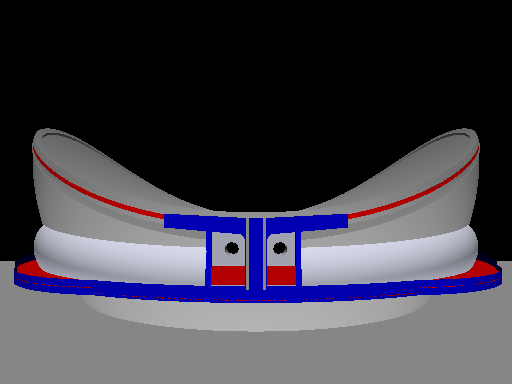 The
next step, as you can see, was to create the walk ways, and
buildings lining the dome. I originally tried to do the buildings
using separate cylinders (as seen below) but this looked terrible.
Thus by using a carefully placed torus object I achieved a decent
looking lining building. The arches added between the building was
actually really difficult due to some of the details add, and can be
seen better in a different view. The walk way itself wasn't too
tough as I just used a couple of cylinders, one really thin for the
floor, and one that was open for the railing. A separate sphere for
the roof was also created with a nice looking fringe. The
next step, as you can see, was to create the walk ways, and
buildings lining the dome. I originally tried to do the buildings
using separate cylinders (as seen below) but this looked terrible.
Thus by using a carefully placed torus object I achieved a decent
looking lining building. The arches added between the building was
actually really difficult due to some of the details add, and can be
seen better in a different view. The walk way itself wasn't too
tough as I just used a couple of cylinders, one really thin for the
floor, and one that was open for the railing. A separate sphere for
the roof was also created with a nice looking fringe. |
 This
image shows the first attempt at the lining buildings. Due the angle
of the circular dome and the lack of a matching angle for the
cylinders I tried to use to line the building, I decided to scrap
the idea. It appears way to choppy and was not very effective. This
image shows the first attempt at the lining buildings. Due the angle
of the circular dome and the lack of a matching angle for the
cylinders I tried to use to line the building, I decided to scrap
the idea. It appears way to choppy and was not very effective. |
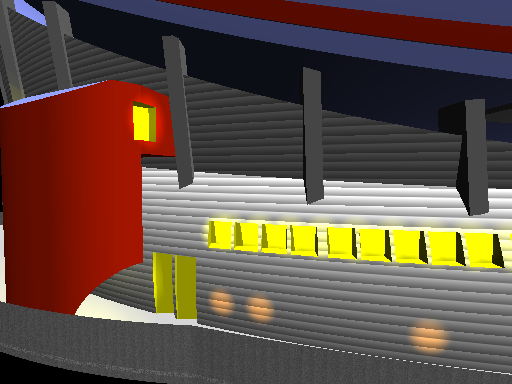
 Here
I have added the windows and doors, as well the arches lining the
building and connecting the bottom sphere to it's roof piece. The
windows and doors were tricky as they all needed to be rotated
slightly different along the y-axis so that they would enter the
dome at the correct angle. The structure pillars were just a matter
of trial and error to get the pillars to appear at the correct angle
and the correct placement in the image. Here
I have added the windows and doors, as well the arches lining the
building and connecting the bottom sphere to it's roof piece. The
windows and doors were tricky as they all needed to be rotated
slightly different along the y-axis so that they would enter the
dome at the correct angle. The structure pillars were just a matter
of trial and error to get the pillars to appear at the correct angle
and the correct placement in the image. |
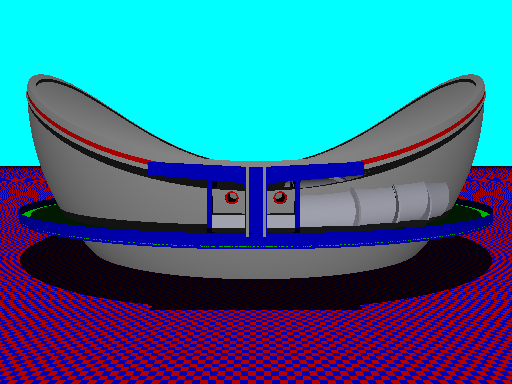
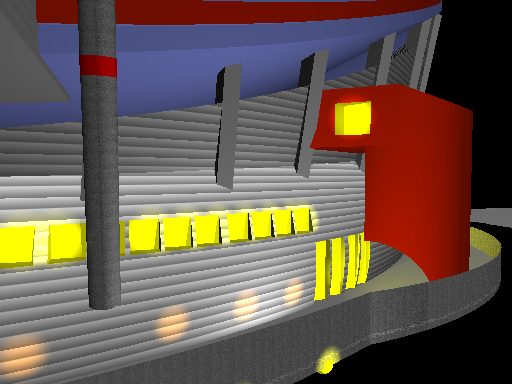
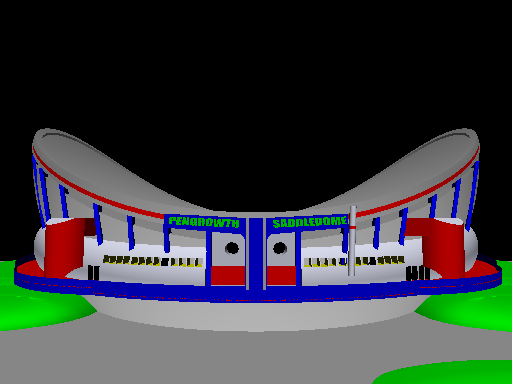 This
image shows the addition of the "steam pipe" like thing, the words
on the T-arch, the red cylinders on the outside of the edges of the
dome and also the hills around, and in front of the dome. The steam
pipe was pretty simple. The textures took a little bit of tweaking
to angle and resize appropriately. One of the red arches was quite
difficult, but the second was simply coping the first and rotating
it along the y-axis to the other side of the dome (and then doing a
little bit of tweaking). The hills were actually quite difficult to
get at the appropriate angle under the dome, with a nice look to
them. This
image shows the addition of the "steam pipe" like thing, the words
on the T-arch, the red cylinders on the outside of the edges of the
dome and also the hills around, and in front of the dome. The steam
pipe was pretty simple. The textures took a little bit of tweaking
to angle and resize appropriately. One of the red arches was quite
difficult, but the second was simply coping the first and rotating
it along the y-axis to the other side of the dome (and then doing a
little bit of tweaking). The hills were actually quite difficult to
get at the appropriate angle under the dome, with a nice look to
them. |
 This
shows my first attempt at the bottom part of the Saddledome. As you
can see it turned out quite poorly and was eventually scrapped. The
idea was to use a completely separate cylinder for the bottom to
match the design of the dome, however it appeared off centered and
was too hard to correct and present in an appeasing manner. This
shows my first attempt at the bottom part of the Saddledome. As you
can see it turned out quite poorly and was eventually scrapped. The
idea was to use a completely separate cylinder for the bottom to
match the design of the dome, however it appeared off centered and
was too hard to correct and present in an appeasing manner. |
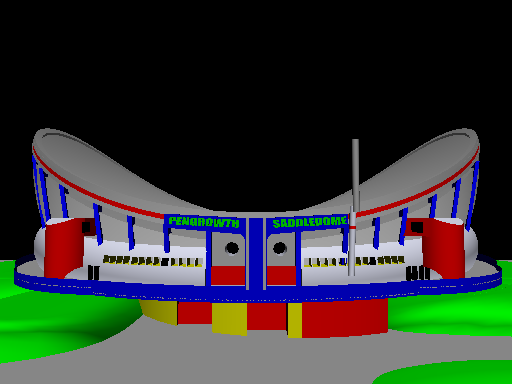
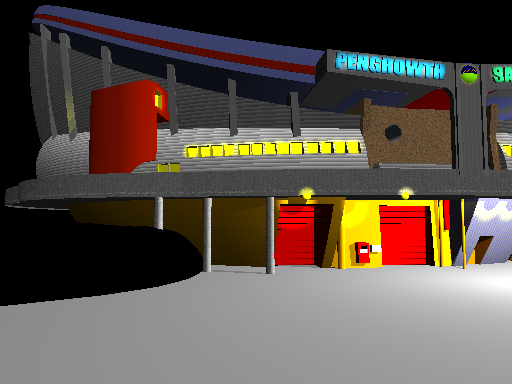
 This
image shows my Saddledome with the textures now applied and a mostly
finished bottom (and a couple of other details). The roof actual has
imbedded squares in it's bluish/purple color causing quite a lag in
rendering time. Almost all the colors were changed to suite the
actual dome. Changing the distinct colors to different shades of
striped grey seemed to make the picture boring, however some of the
other changes seemed to add a little bit to the picture. This
image shows my Saddledome with the textures now applied and a mostly
finished bottom (and a couple of other details). The roof actual has
imbedded squares in it's bluish/purple color causing quite a lag in
rendering time. Almost all the colors were changed to suite the
actual dome. Changing the distinct colors to different shades of
striped grey seemed to make the picture boring, however some of the
other changes seemed to add a little bit to the picture. |
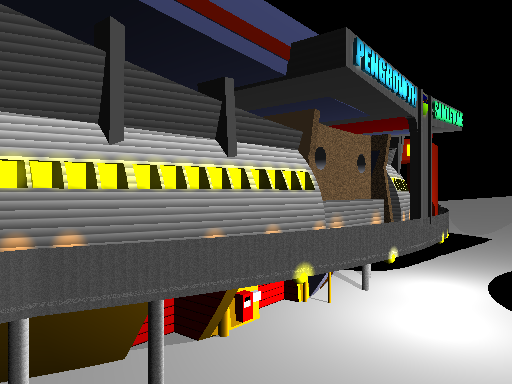
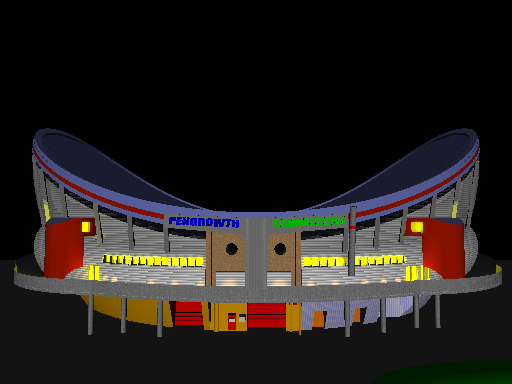 The
lighting was the last major adjustment to the picture and may be
what I am most satisfied with. This is because of how apply the
actually textures and colors seemed to make the Saddledome boring. I
find the addiction of lights (and many of them) showed the textures
better and presents the picture in a much better manner. Most of the
lights were done with spotlights, used to project the light to the
windows and doors. The
lighting was the last major adjustment to the picture and may be
what I am most satisfied with. This is because of how apply the
actually textures and colors seemed to make the Saddledome boring. I
find the addiction of lights (and many of them) showed the textures
better and presents the picture in a much better manner. Most of the
lights were done with spotlights, used to project the light to the
windows and doors. |
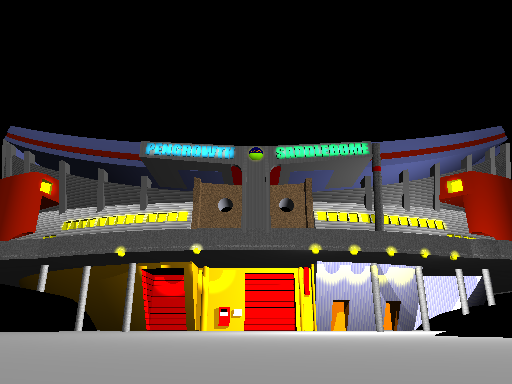
The final and remaining step was to just add finishing touches and
as much as time would allow. There were other things I would like to
have got finished but due to a time constraint could not be added to
the pictures (things like a parking lot and cars and trucks to go in
it). However I feel the picture is still quite impressive and does a
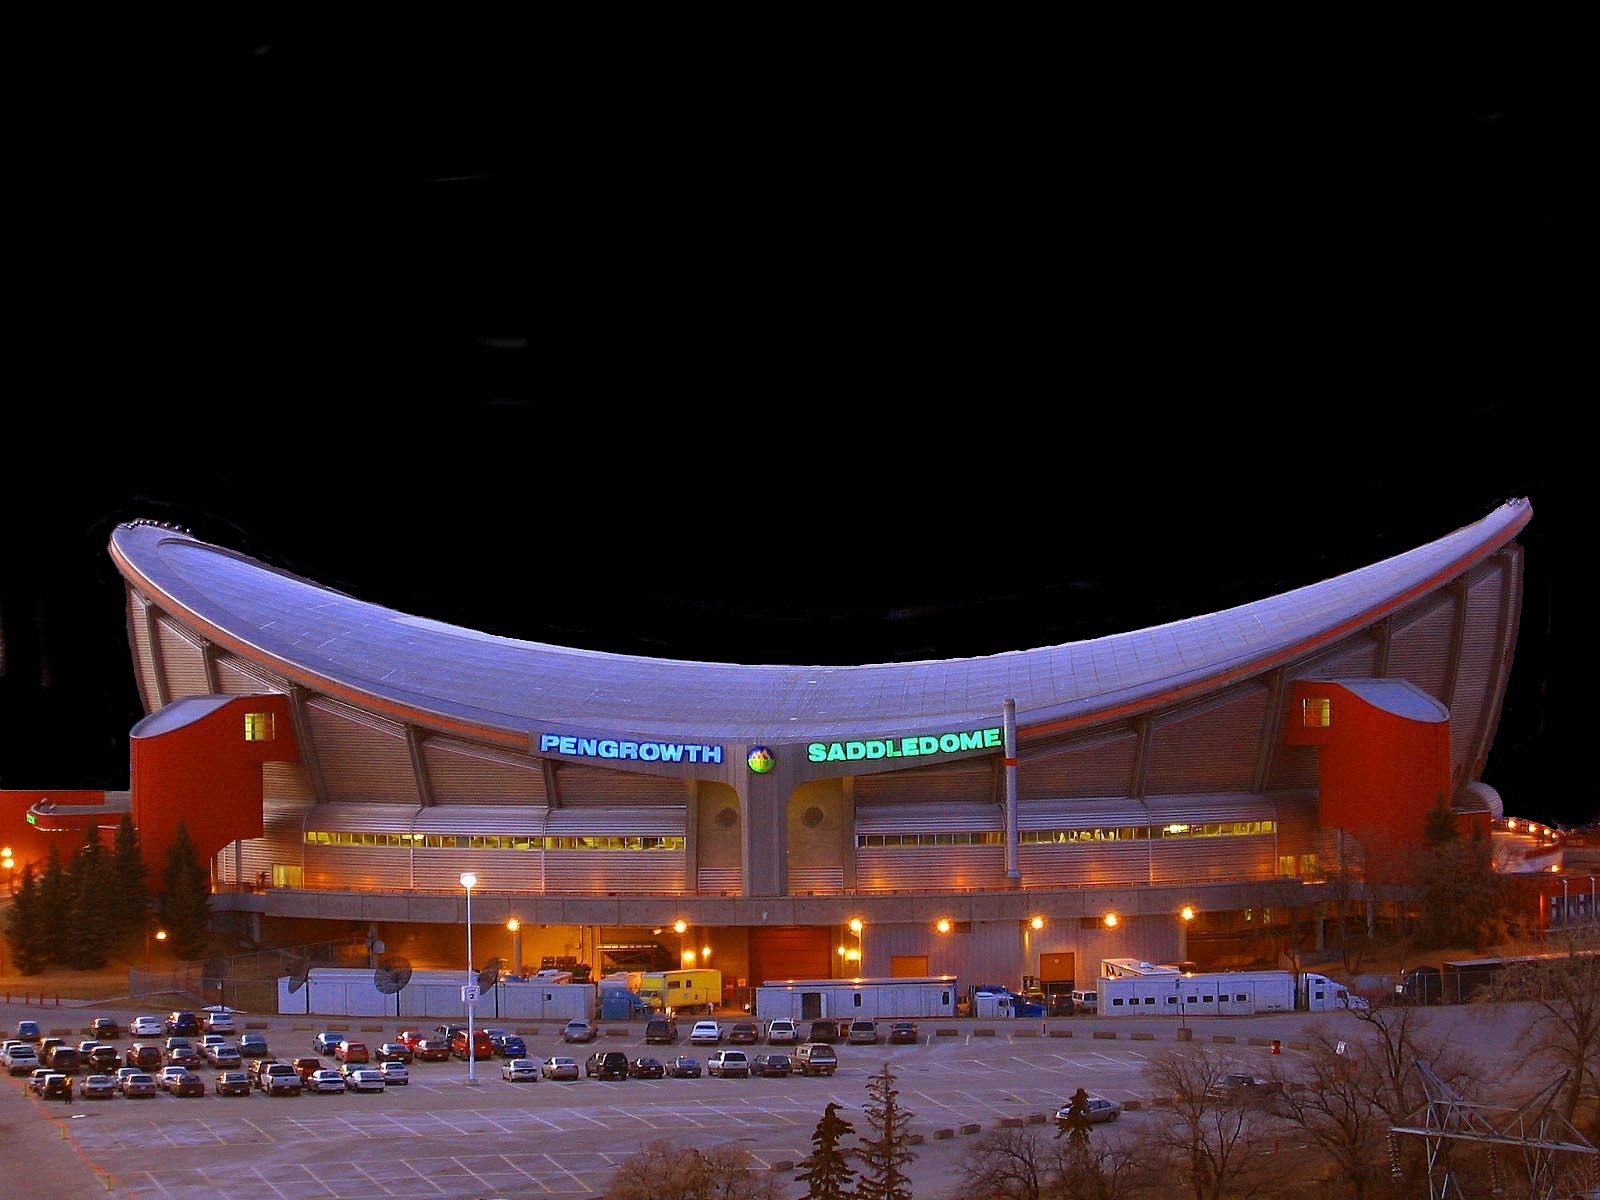
good job of reflecting the actual dome. Below is the actual dome
followed by different views of my finished project:
THE ACTUAL PENGROWTH SADDLEDOME:
MY PENGROWTH SADDLEDOME (from a
similar angle):
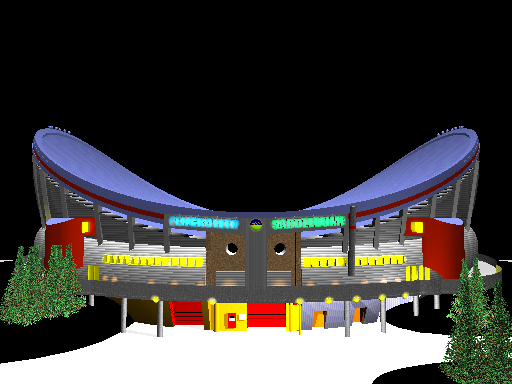
(lighter)
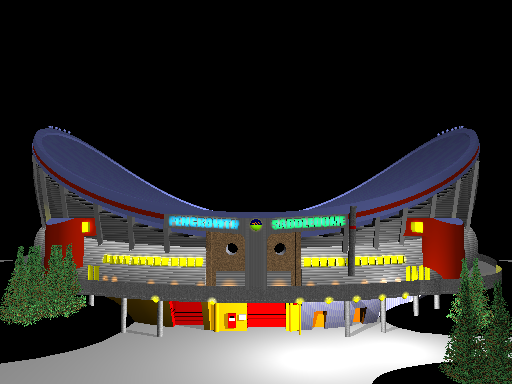
(darker)
MY PENGROWTH SADDLEDOME (pictures
from different angles):
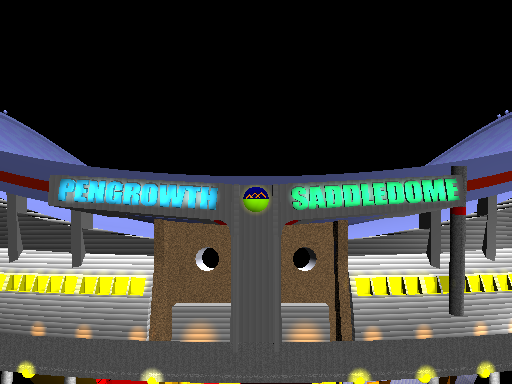 
  |
|
CREDITS -
The only thing I borrowed or adapted was a tree generator for the
pine trees at the side edges of the Saddledome. The original was
downloaded at the following website and much credit on the tree work
is due (it is called XTree on the site):
http://www.xs4all.nl/~remcodek/pov.html |
|
FUN FACTS -
without trees: 96 finite objects, 2 infinite objects, 86 light
sources |