Computer Science 3710
Sterling McClung
001040448
The Lethbridge Viaduct was built in the early 1900's. It is over 5300 feet long and more than 300 feet in height. It is a steel structure with 33 self-standing towers. This bridge has become an integral part of the Lethbridge landscape and Lethbridge is proud to be home to the largest bridge of it's kind in Canada.
I decided that the viaduct would make a good choice of landmark to model in 3-D for the CS3710 project. The bridge offers a large number of basic elements that individually would take too much effort to model properly. However, using the loop, macro and functions that are available in POV-Ray, I knew this immense task could be reduced to just a few lines of code.
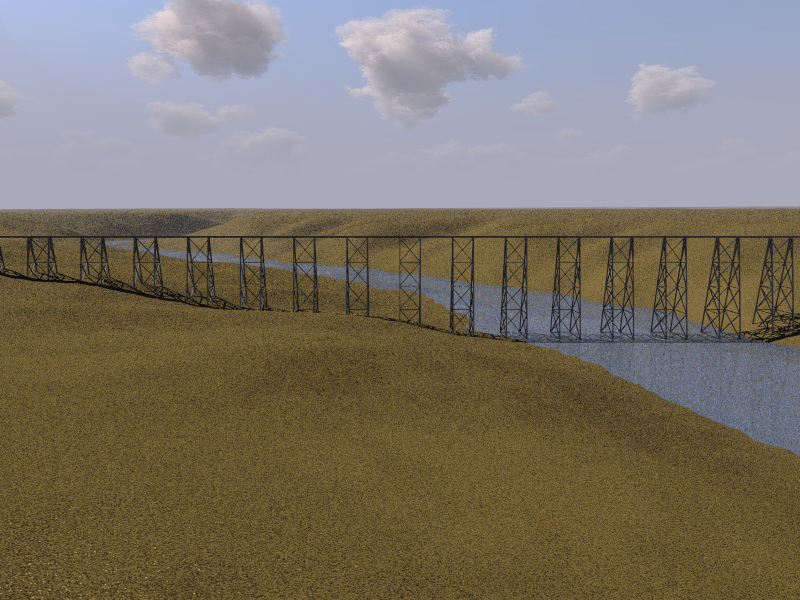
The first part of the scene I create was the bridge itself. Here is a look at the entire bridge that is created:
This is created using a single box, which runs along the top of the towers, and tower sections. I took care when creating the first tower section, so that I would be able to reuse it to create the remainder of the sections. In fact, I only create the first one, then based on different variables in the code, create each section in a tower, then create all the towers. This means that it is really easy to change things like the number of sections per tower, towers per bridge, width of the bridge at the top, and the angle of the bents. As I was creating the scene I tended to show off this feature from time to time, and I just noticed that all the pictures that I have created so far have been made with only 4 sections per tower, instead of the 6 that there should be. So the final picture will have the correct number of sections.
You may have noticed th nice gradient that is seen as a background in this picture. As it had been a while since I last had to create an outdoor picutre in POV-Ray, I went looking for some basic example scenes that include sky and ground from which I could create my own. Early on in the project, I starting using one such scene definition. However, this is a much more elaborate sky definition that I will explain later.
I originally wanted to get exact measurements for the bridge and create a perfect replication of the bridge in 3-D. But to do this, I realized I must also include the coulees and river in the scence. I knew, from looking at previous projects and the POV-Ray documentation, that this was possible through the use of a height field. I found that the government offers some basic, relatively low resolution topographic images. I used one of these to create the coulees that you see. This ended up being easier in some ways than I expected, but harder in others. To actually get the height map created was very simple. Simply format the file supplied by the government by one of many tools available to do so, and create the height field with a few lines of code in POV-Ray. The hard part was adjusting the field to match the dimensions I was using and fit the bridge in somewhere. This meant moving and rotating the bridge, while scaling the hieght field to find a location that worked both the lenght and height of the bridge.
As I mentioned earlier, the sky and clouds in the scene are not my creation. After spending the time to get the height field working, I wantedto create a small amount of vegetation for the scene. I went looking for information about creating vegetation in POV-Ray. This proved less fruitful than I imagined, but I came across a few references to the "Landscape of the Week". This is a project that was seen in the POV-Ray newsgroup a few years back. It seems to have been a collaborative effort to increase awareness of creating realistic landscapes in POV-Ray. The sky, sun and clouds are all elements from that project. If you would like to see the project, search the POV-Ray newsgroup for Tierra and LOTW.
I originally hoped to adjust that code to fit my scene. I spent quite a bit of time on this. The main problem was that the Tierra scene was created with a unit eqalling close to a kilometer, while I worked with one unit as a foot. Below is my last attempt to modify they tierra code to my scene:

As you can tell, I was not very successful. In the end I modified my code to work with the Tierra code.
For the vegetation I ended up creating a few loops that create some simple "grass blades", just cylinders for now. Creating a cylinder is very simple, but finding where to place the grass blade is a litte more difficult. Because I was using a height field, the y coordinate of the blades' location would be very difficult to determine. Luckily, recent versions of POV-Ray include a function called "trace". This function takes a start and end parameter, among others. The function traces the line from start to end and returns the
This seemed like a fantastic find, and I quickly put it to work, in some test scenes. I found I was able to place over 300 blades of grass in a 10'x10' area before running out of memory. At that point, I was processing over 1.2 billion tokens in my files. But I did not include the clouds in these test scene. When I included the clouds, I had to drop the blade count to 50-100 per 100 sq. ft. depending on the size of the scene.

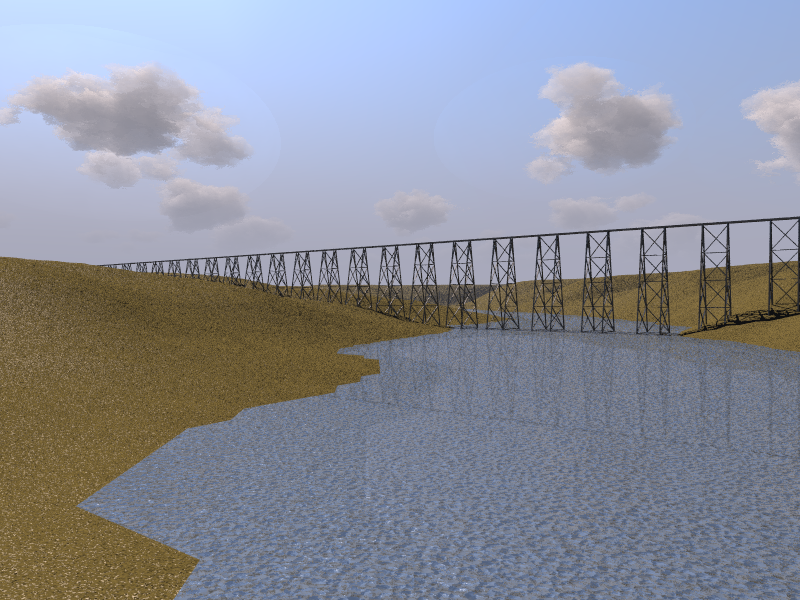
You can see the "grass" on the hill in the background here. I played with the settings for the water a fair bit, and ended with what you see in this image. Nothing really special.
Here is the last image that I have created. It includes radiosity settings, to help with the realism. Radiosity adds a lot to the render time, so this is the only image that I rendered with it. I hope you like!

Here are a few more images, just for fun...