Again?
Yes, I realize that this particular landmark has been modeled a few times in the past. It's an ideal candidate because of its relatively primitive shapes, its repetitious features, and its symmetry. Still, the water tower is complex enough to be challenging to model.
The Tool
I decided to use Blender, an open source 3D modeler, for my project. I had used this piece of software before and knew that it was quite powerful, even if it presented more of a learning curve than modeling with PovRay.
Blender has a vast array of features, most of which I didn't use for my work. Basic mesh modeling, some tweaking of materials and shading, as well as UV mapping for textures were the capabilities used for the tower.
The Process
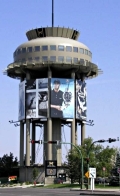
Wireframe of beginning work.
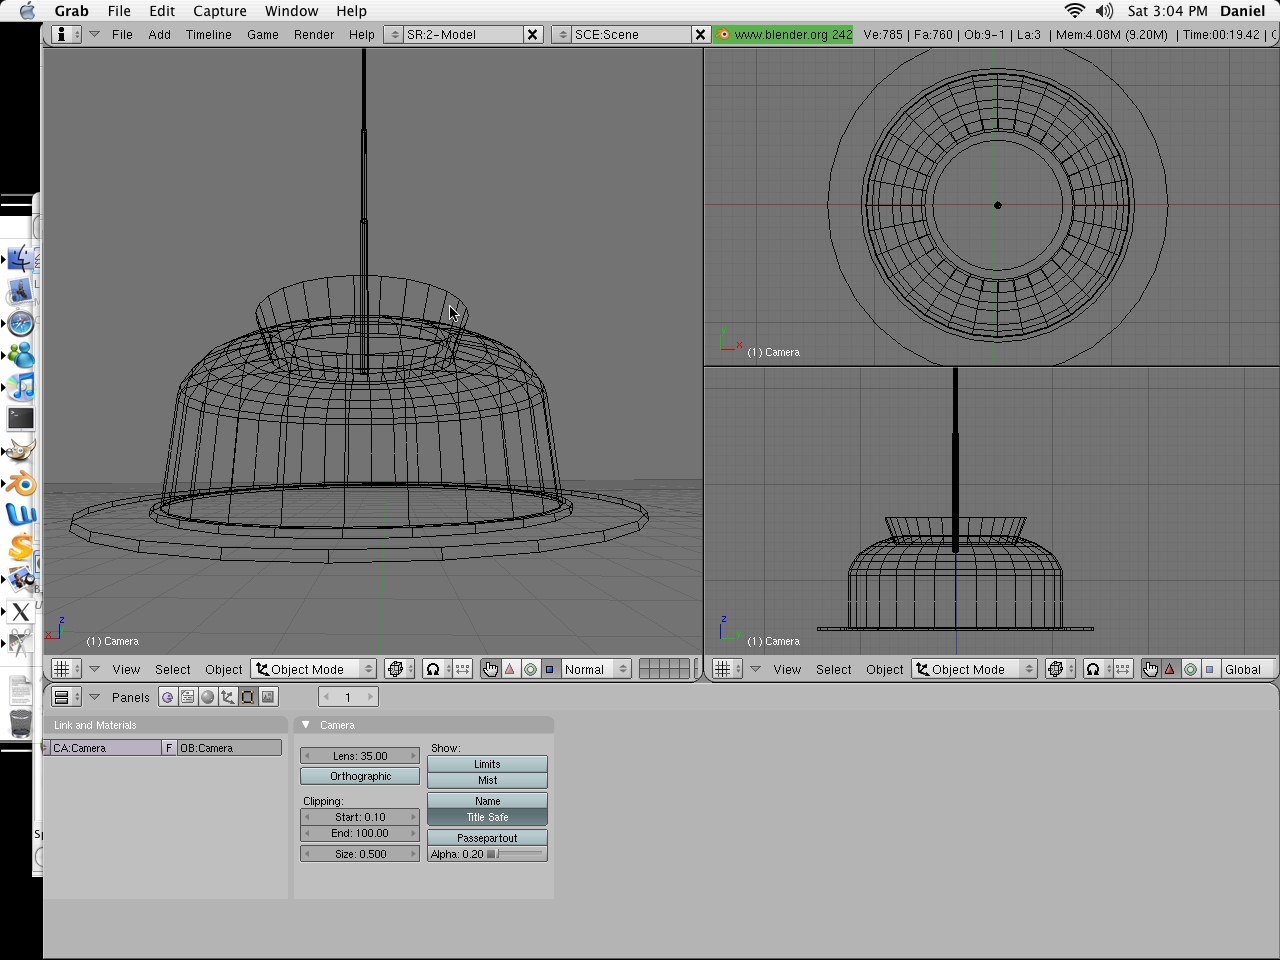
Shaded mesh with arrays of windows and spokes.
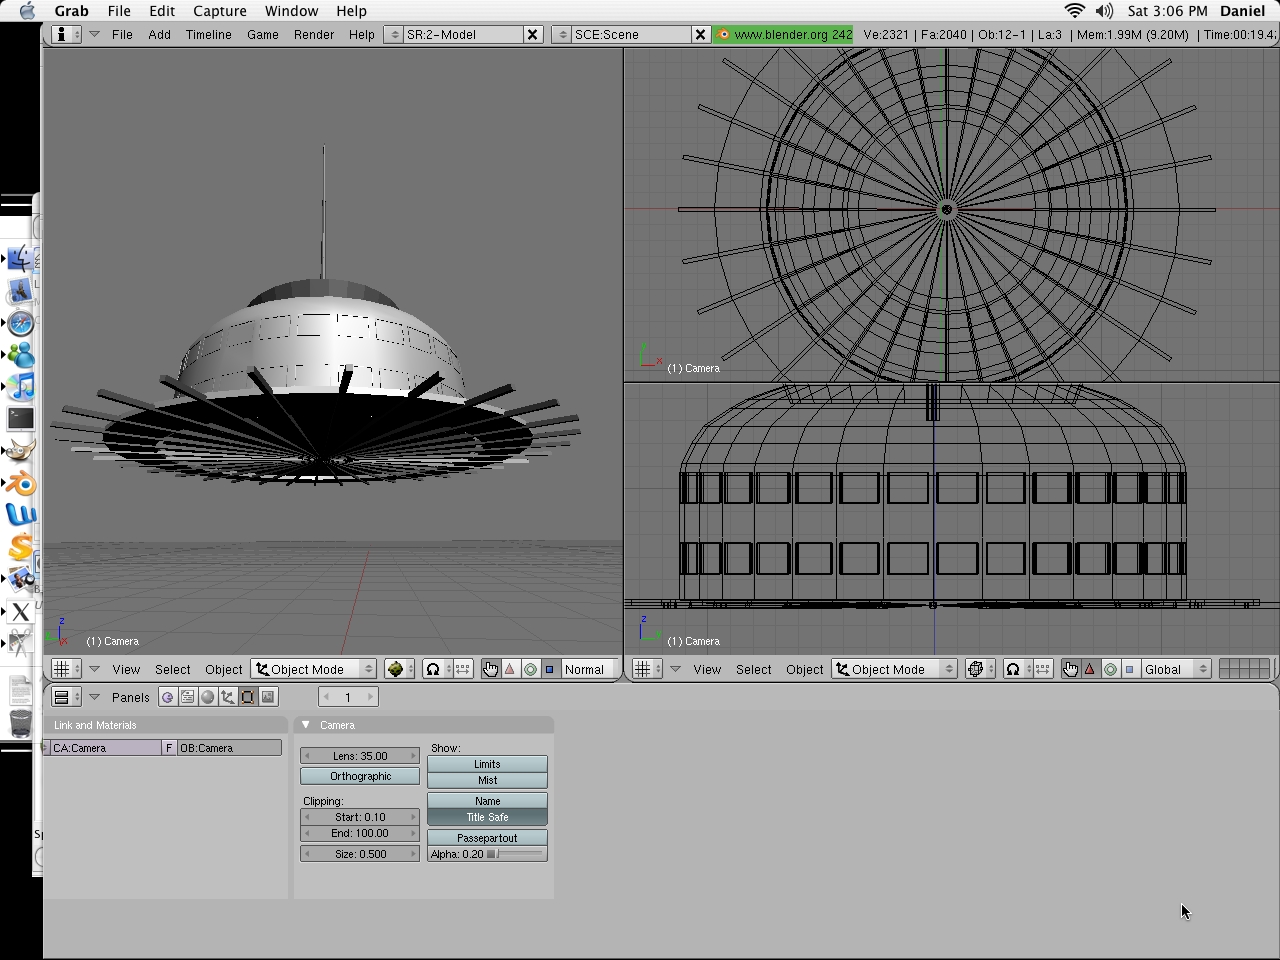
Tower with pillars and base.
Modeling
I started off with a sphere for the top section of the tower, keeping only the top of the sphere and then extruding edges to get the straight walls.
The circular platform began as a cylinder; the hole in it was created by performing a boolean intersection operation with another cylinder.
The cone at the top was again created with a cylinder with its top and base faces deleted, then the bottom was scaled to give the appropriate angle.
The antenna is just a cylinder with some minor extruding and mesh modeling.
Using some reference photos, I determined that the top of the water tower had a 'thirty-two-point' architecture; there seemed to be approximately thirty-two sets of windows and thirty-two horizontal spokes. This presented the challenge of getting all those objects into my model without having to model each of them individually.
I thought of the possibility of simply using a texture for the sixty-four windows, but on the real water tower their frames protrude so obviously from the walls that a flat texture wouldn't do the trick. I would also have no control over specular (reflection) levels on the window glass.
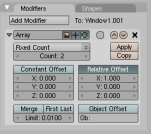 I found a mesh modifier in Blender called Array that would duplicate an object any number of times, using a given offset. Unfortunately, the modifier didn't have any simple way of doing rotation, so my windows and spokes would only end up going in a straight line.
It was possible, however, to use another object in the world as the relative offset for the array of meshes. It was quite finicky, but if I placed a second spoke in the perfect sequential position, I could get thirty-two of them sticking out all the way around the tower. The same method ended up working for the windows, although not without a lot of fiddling.
Adding nine more cylinders gave me the pillars. The eight smaller ones needed some mesh modeling at the top to give the little claws that hold onto the bulb at the top.
The base was sliced up to match the true tower's design. The spokes on its roof were fairly easily obtained from the bigger ones up top.
Texturing
Even after this modeling hassle, texturing might have taken the longest time for me to figure out. I used UV mapping for all of my texturing, and spent quite a while learning how to use Blender's UV editor.
Basically, for each face of a mesh, you can specify which portions of an image should be plastered upon it. This picture shows the UV editor with the resulting texture mapping:
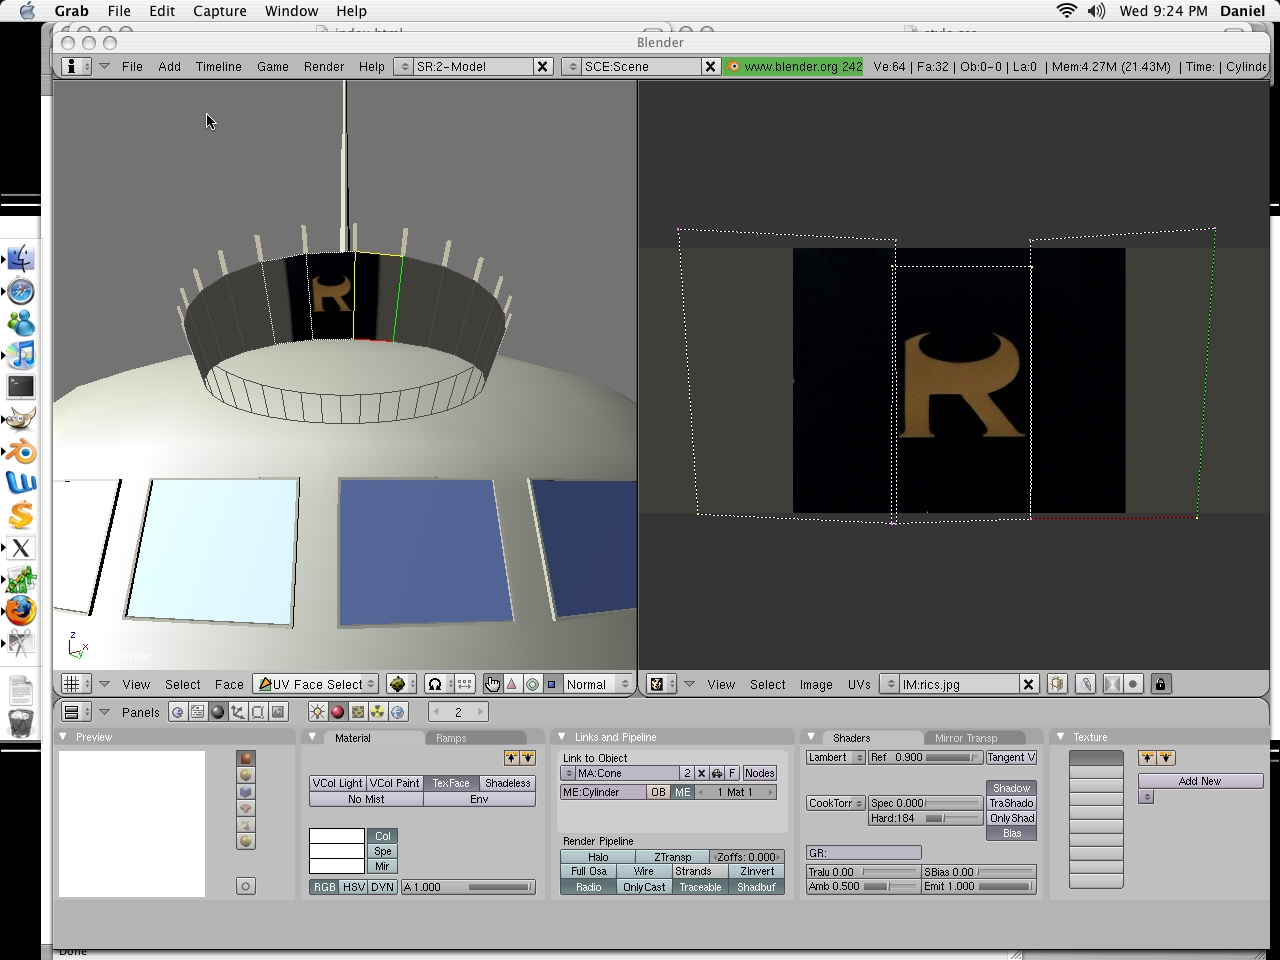
Instead of spending a lot of time modeling the details of the base, I kind of wimped out and plastered textures from photos that I took on the mesh. Obviously I used textures for the advertisment billboards as well.
Lighting
I'm afraid I'm not really strong on my lighting theory, in the real world or in 3D modeling, so this was mostly a lot of trial and error. My main objectives with lighting were to get the gleam on the bulb of the tower, to get a shadow cast on the billboards, to get a bit of a glare from the windows, and to get as close to the lighting in my reference photos as possible.
Here's top and left orthogonal views that show my light setup:
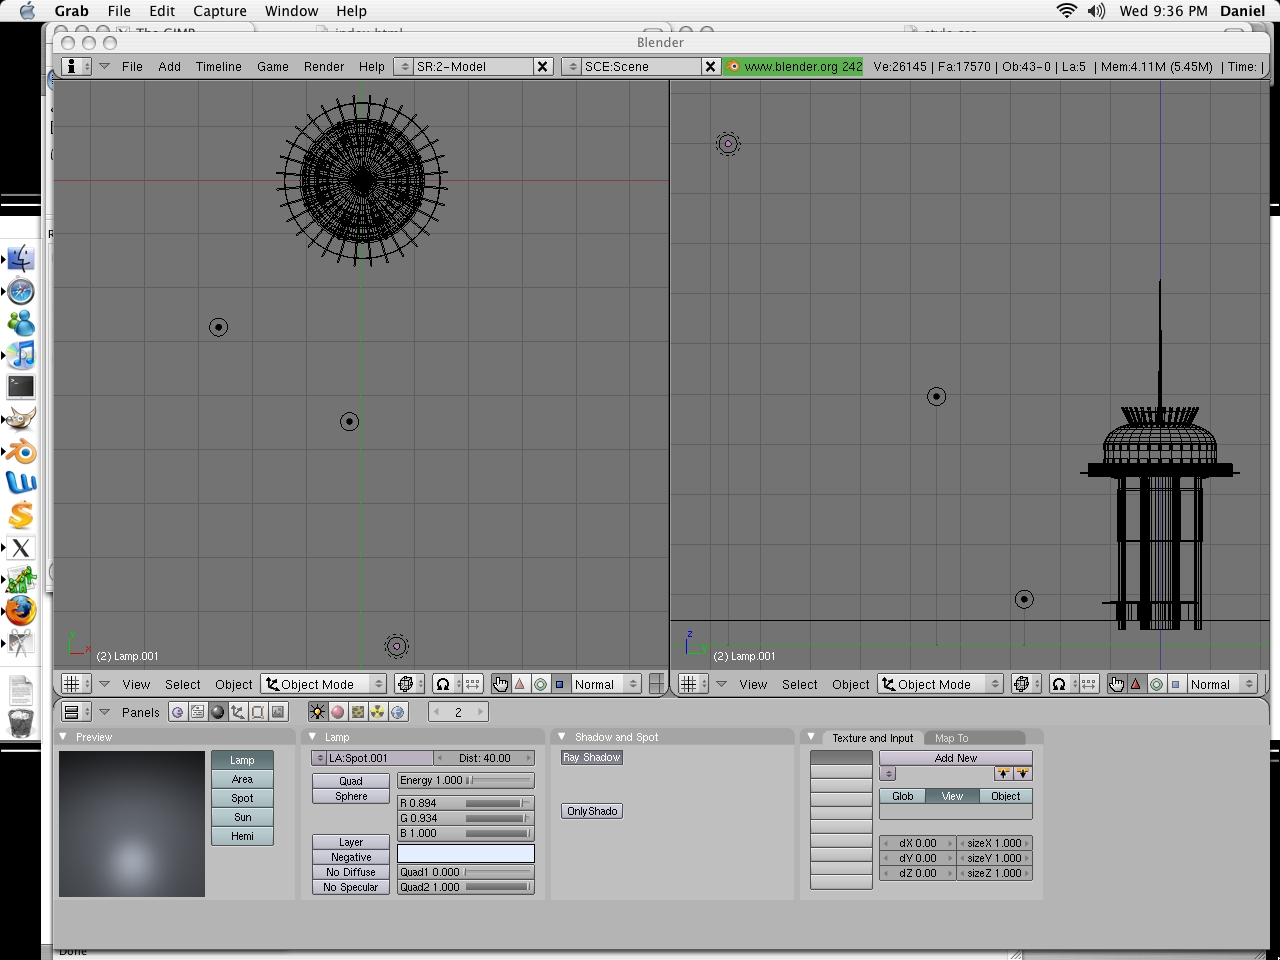
All lights are of 'lamp' type in Blender. The one positioned highest is the only one that casts shadows. The others help to fill in shadows and generally cast light in good places.
The Result
After all this blood, sweat, and tears, I ended up with this render:
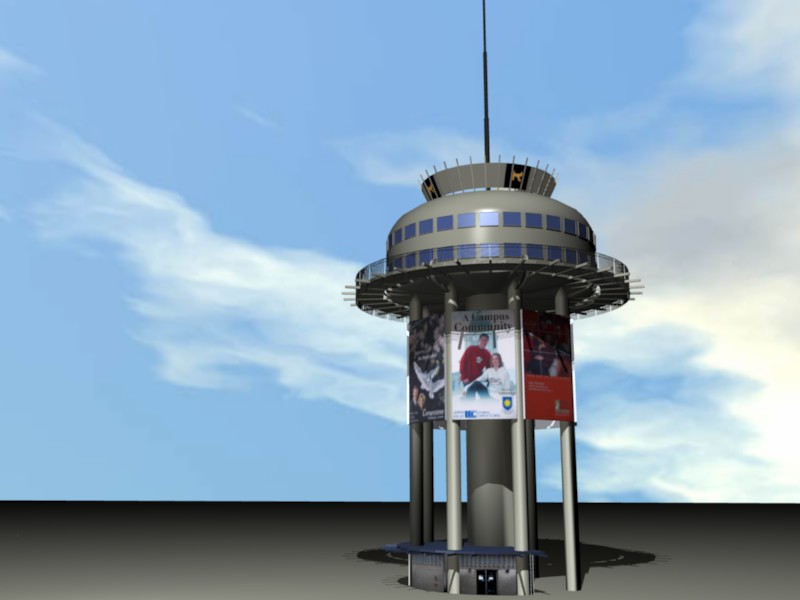
It looks like all of Lethbridge sunk below some gray plane, but the sky texture that I borrowed from CADTutor sure is beautiful.