To create my model I decided to use Google Sketchup, which is available for free at http://sketchup.google.com . I chose this program because it seemed very intuitive and was fast to learn.
Even though the program is very intuitive, I still spent many hours learning how to create models. Getting to the point of initial modelling is very fast in Google Sketchup, compared to other programs such as Blender that would have taken many hours just to get to the point of being comfortable navigating the workspace. Advanced techniques do require some additional learning, and I have to credit google for their highly useful training videos, which I made frequent use of.
Enough about the program, on to the production:
Research
Using a local landmark was a big advantage because it allowed me to get very specific pictures of the fire hall. In particular I took a photo of each visible side of the building, making sure the picture is perpendicular to the face of the building. This, in combination with the insurance plans obtained from the Galt archives allowed to put all features of the building into a reasonable scale. |
Simple Construction
After creating the initial box, I decided the easiest way to keep things to scale would be to start at the bottom and work my way up. |
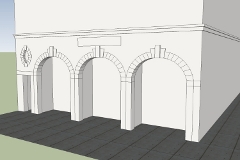
Adding DoorsLet's face it, a building isn't much of a building if you can't get into it. Logically, the doors were the first thing on my list. After creating guidelines for the basic dimensions, I added the basic arches and created the recessed areas for the door. Because this was my first time using the program, I decided to try my hand at adding details to the lower section first. This lead to a few important lessons, including making repeated items into components and also how components interact with the model. 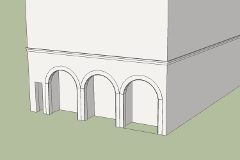
|
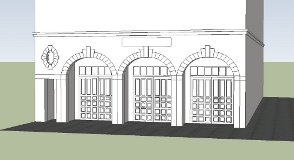
Adding WindowsTime to shed some light on the situation: we need windows. This step went a little faster than the doors, partly because of my gained experience, and partly due to a high degree of repetition. 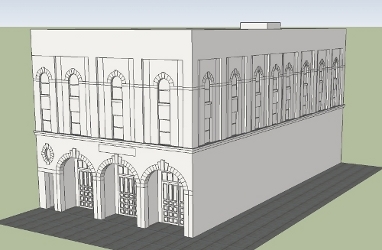
|
The Tower
Although it is a fairly complex shape, it was easily accomplished by using a side profile of the tower and the follow-me tool around the base shape (an octagon). Again I used components to make editing all 8 sides of the tower at the same time a snap. I'm fairly happy with the result, but if I were to be rendering with the tower in a closer view I would probably add more detail. |
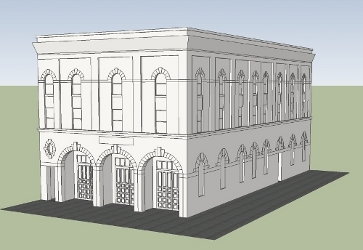
Adding Texture
Because of this adding the textures was only a matter of time, and little frustration. I did however find places where my components were not behaving as expected, which lead to additional work due to some repetition. The upper windows are a good example of this, due to the fact that there are three of them that are not the same as the others, and as such, each was textured seperately. |
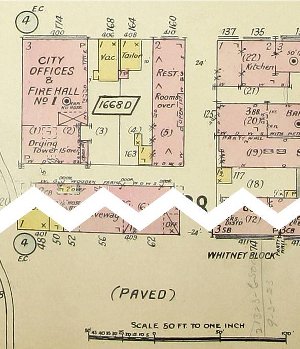 Before undertaking any of the modelling process, I decided
to do a little research to make my life easier. A quick trip
to the Galt archives netted me original scale drawings of
downtown Lethbridge, all the way back from 1915. After
getting a photocopy of the page I needed, I found out that the
University holds a digitized copy of the same documents.
Large printout in hand, it was time for more photos.
Before undertaking any of the modelling process, I decided
to do a little research to make my life easier. A quick trip
to the Galt archives netted me original scale drawings of
downtown Lethbridge, all the way back from 1915. After
getting a photocopy of the page I needed, I found out that the
University holds a digitized copy of the same documents.
Large printout in hand, it was time for more photos.
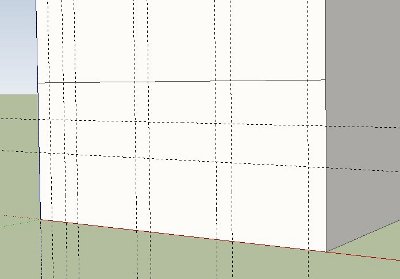 The first step was to create the rough shape of the building, to
scale. With the information I had, it was fairly easy to
get Sketchup to create the building to the appropriate
scale.
The first step was to create the rough shape of the building, to
scale. With the information I had, it was fairly easy to
get Sketchup to create the building to the appropriate
scale.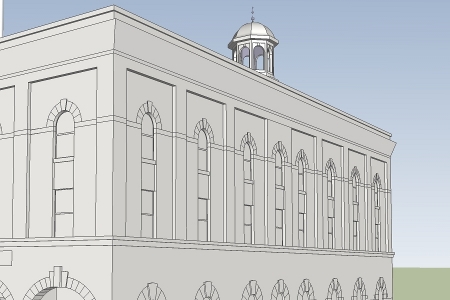 I guess you coud say I saved the best for last.
As a finishing touch, I added the tower to the top
of the building.
I guess you coud say I saved the best for last.
As a finishing touch, I added the tower to the top
of the building.
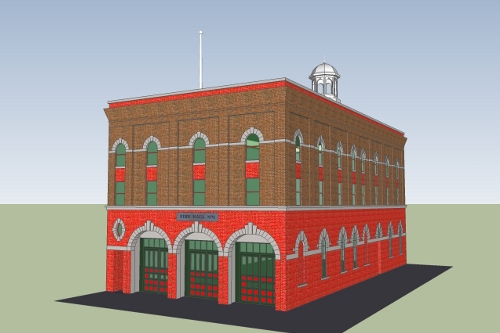 Time to add some color and texture
to my model. Thankfully Sketchup is fairly
intuitive when it comes to texturing, and also
comes with a good enough selection of textures to
make the basic building.
Time to add some color and texture
to my model. Thankfully Sketchup is fairly
intuitive when it comes to texturing, and also
comes with a good enough selection of textures to
make the basic building.
