3D Studio Max
Geomagic Studio exported the mammoth model as a Wavefront .obj file. The model was loaded into 3D Studio Max to be repaired. The first tweak required was to flip the model's normals (apparently the export function in Geomagic reversed them).
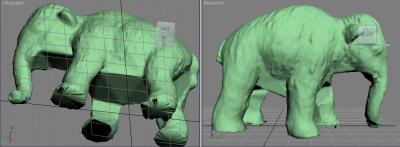
Shape repair - soft select to the rescue
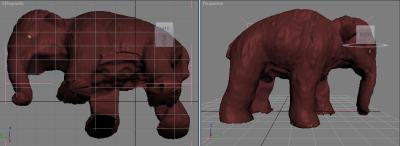
Geomagic Studio had left the mammoth with a very boxy underbelly, neck and legs (but the filling of holes was still surprisingly effective). The vertices and polygons that formed the surface of the mammoth were very dense. Consequently, it was difficult to rearrange the vertices into a more natural shape.
Soft select enabled vertices to be moved in a way that encouraged the selected vertices to be distributed in smooth curves. The organic effect of soft select was well suited to shaping the mammoth's belly. Soft select made cosmetic surgery of the mammoth easy (or at least less frustrating than "hard selection").
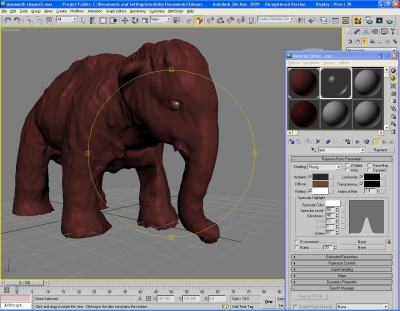
Materials and lighting
Materials and lighting in 3D Studio Max were of primary importance. Unfortunately, the behaviour of materials and lighting in 3D Studio Max is not intuitive. A 3D Studio Max book from the library, 3D Studio Max Fundamentals, was invaluable at this point. Even with the book, raytraced materials, mappings and lighting were among the most mystifying aspects of this project.
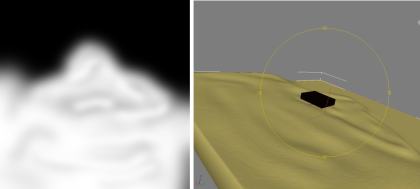
Displacement of surfaces
One of the best things about 3D Studio Max is that it has so many features that it is bound to have at least one that will make one's scene look better with minimal effort. Creating a landscape using displacement falls into this category. A displacement map tutorial may be found here. (At the time of this writing, this link's server seems to be having troubles).
Basically, displacement mapping allows one to create a 3D surface from a 2D image. Scribbling in Gimp and smoothing the result can produce a landscape in seconds.
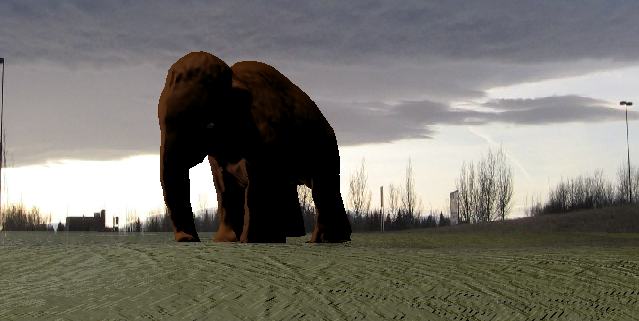
Environment map
The environment map was another good trick (described on p. 381 of 3D Studio Max Fundamentals). It enabled the mammoth to be integrated into a background image. More tweaks (such as manipulating the background image to better fit the 3DS scene) could have made this technique look more realistic. Overall, however, it took little effort to apply an environment map but significantly improved the final image.